

How to Install a Fiber Optic Distribution Box in Just 5 Easy Steps
Step-by-step guide for installing a fiber optic distribution box to ensure optimal network performance.
Introduction
A fiber optic distribution box is an important part of your network setup. It provides a safe and secure place for optical cables to connect, keeping your network strong and reliable. By placing it correctly, you can also prevent any outside factors from affecting your network’s speed and efficiency.
In this guide, we will show you how to install a fiber optic distribution box in five simple steps. Following these steps will help you set up your network correctly and make sure everything is working smoothly.
- Key takeaway: This guide will walk you through the step-by-step installation process for a fiber optic distribution box, ensuring that your network operates at peak performance.
Understanding Fiber Optic Distribution Boxes
Definition and Purpose
A fiber optic distribution box is an important component in optical communication. It protects the connection point between the optical cable and the user end, making it essential for maintaining network stability and reliability.
Application Scenarios
Fiber optic distribution boxes are commonly used in various scenarios:
- FTTH (Fiber to the Home): Installed at residential buildings to connect individual homes to the fiber network.
- FTTB (Fiber to the Building): Positioned in multi-dwelling units or commercial buildings for broader connectivity.
- FTTC (Fiber to the Curb): Deployed near streets or curbs to provide fiber access to nearby buildings or homes.
Benefits
Distribution boxes offer several key benefits:
- Protection of Connection Points: Shields critical connection points from environmental factors such as dust and water.
- Ensuring Stability: Maintains stable connections, crucial for uninterrupted data transmission.
- Reducing Interference: Minimizes external interference, enhancing signal quality and network performance.
These boxes play a vital role in modern fiber optic networks, ensuring robust and reliable communication channels.
Internal Structure and Components
A fiber optic distribution box houses several critical components designed to protect and manage the optical connections efficiently. Understanding these internal components is key to ensuring a successful installation and optimal performance.
Key Components
- Interfaces: These are the access points where external optical cables connect to the distribution box. They facilitate seamless integration with the broader network, allowing for easy connection and disconnection of fiber cables.
- Cable Inlets: Designed for guiding incoming and outgoing optical cables into the distribution box, cable inlets ensure that cables are securely held in place, preventing any bending or damage that could impair signal quality.
- Splice Trays: These trays hold and organize the spliced fiber connections. Splice trays are essential for maintaining an orderly configuration within the box, protecting splices from physical damage, and managing excess fiber lengths neatly.
- Fiber Splitter Disks: Used to split a single optical signal into multiple signals, fiber splitter disks are crucial in scenarios where one input needs to serve multiple outputs. They ensure efficient signal distribution without significant loss or interference.
Each component plays a vital role in maintaining the integrity of your network connections. Properly configuring these elements can drastically reduce interference, improve signal stability, and enhance overall network performance.
Choosing the Right Type of Distribution Box for Your Needs
When you’re looking for a fiber optic distribution box, it’s important to keep in mind a few key factors that will help you find the best one for your specific needs. By understanding these factors, you’ll be able to make an informed decision and select a distribution box that is perfectly suited to your network setup.
Capacity
The capacity of a distribution box refers to how many optical fibers it can accommodate. Depending on the size of your network and the number of connections you need to make, you may require a distribution box with a higher or lower capacity.
For smaller installations, a box with a lower capacity may be sufficient. However, larger networks with more connections will likely need a higher-capacity box in order to handle the increased volume of traffic efficiently.
Installation Mode
The installation mode of a distribution box refers to how it is mounted or placed in your network environment. There are typically two main installation modes to choose from:
- Wall-mounted: This type of installation is ideal for indoor environments such as server rooms or data centers. Wall-mounted distribution boxes are designed to be compact and space-saving, making them perfect for areas where floor space is limited.
- Pole-mounted: If you’re planning on installing your distribution box outdoors, a pole-mounted option may be more suitable. These boxes are specifically designed to be weather-resistant and durable, ensuring that they can withstand the elements and provide reliable performance even in harsh conditions.
Application Scene
The application scene refers to the specific environment or scenario where the distribution box will be used. Different scenarios may have varying requirements when it comes to the design and features of the distribution box. Here are some common application scenes:
- FTTH (Fiber To The Home): In this scenario, the distribution box will typically be installed inside residential buildings or houses. As aesthetics are important in such locations, compact and visually appealing distribution boxes are often preferred.
- FTTB (Fiber To The Building): For installations in commercial buildings or multi-dwelling units, the distribution box needs to be able to handle multiple connections efficiently. In such cases, robust and high-capacity boxes are usually required.
- FTTC (Fiber To The Curb): This scenario involves bringing fiber optic cables to a distribution point near the curb or street. Due to its outdoor location, the distribution box used here must be able to withstand various weather conditions and provide reliable performance in spite of exposure to external elements.
Function
The function of the distribution box refers to its main purpose or role within your network setup. Depending on your specific requirements, you may need a distribution box that is primarily designed for one of the following functions:
- Splicing: If you frequently need to join or connect optical fibers together, a distribution box with splicing capabilities is essential. This will allow you to make seamless connections without any signal loss or degradation.
- Splitting: In some cases, you may have one main fiber optic cable that needs to be split into multiple branches or endpoints. A distribution box with splitting functionality will enable you to distribute the signals from the main cable to these different endpoints efficiently.
- Protection: Ensuring the safety and integrity of your network connections is crucial. A distribution box that offers protection features such as environmental resistance (e.g., waterproofing) and physical damage prevention (e.g., sturdy casing) can help safeguard your connections and minimize potential disruptions.
Making an Informed Decision
When it comes to choosing the right type of fiber optic distribution box for your needs, it’s important to consider all of these factors together. Each aspect – capacity, installation mode, application scene, and function – plays a critical role in ensuring that your network operates smoothly and efficiently.
By evaluating your specific requirements in each of these areas, you’ll be able to narrow down your options and find the distribution box that best matches your needs. Whether you’re setting up a small-scale network or managing a large-scale infrastructure, taking the time to choose the right distribution box will ultimately contribute to the overall performance and reliability of your network.
Materials and Manufacturing Process
When choosing a fiber optic distribution box, it’s important to know about the materials used and how they are made.
Commonly Used Materials
Several materials are typically used in the manufacturing of distribution boxes:
- SMC (Sheet Molding Compound): Known for its excellent mechanical strength and durability.
- ABS+PC: Offers a good balance of impact resistance and heat resistance.
- ABS (Acrylonitrile Butadiene Styrene): Popular for its toughness and cost-effectiveness.
- PP (Polypropylene): Valued for its chemical resistance and flexibility.
Manufacturing Process
The manufacturing process involves several key stages:
- Mold Die-Opening:
- The initial design phase where molds are created based on precise specifications.
- Ensures that each component will fit together seamlessly during assembly.
- Injection Molding:
- Molten material is injected into the molds to form the individual components.
- This stage requires careful control of temperature and pressure to maintain quality.
- Assembly:
- Components are assembled to form the complete distribution box.
- Includes installing interfaces, cable inlets, splice trays, and fiber splitter disks.
- Quality checks are performed to ensure all parts are correctly aligned and securely fastened.
Understanding these materials and processes helps you select a distribution box that meets your network’s reliability and durability requirements.
Step-by-Step Installation Guide
Installing a fiber optic distribution box can be straightforward if you follow these clear and concise steps. This guide ensures that you achieve optimal performance for your network by meticulously carrying out each task.
Step 1: Determine the Appropriate Location
Selecting the correct location is crucial. The placement should:
- Align with your network requirements
- Be accessible for maintenance and future upgrades
- Offer protection against environmental elements such as direct sunlight, rain, and dust
- Ensure minimal distance to the endpoints to reduce signal loss
For example, in an FTTH (Fiber to the Home) setup, placing the box close to the main entry point of the building can streamline connections.
Step 2: Prepare Necessary Tools and Materials
Having everything ready before starting can save time and avoid disruptions. Essential tools and materials include:
- Optical cables: Single-mode or multi-mode fibers as per your network design
- Splicing equipment: Fusion splicer, splice trays, heat shrink sleeves
- Fasteners: Screws, anchors, or mounting brackets depending on the surface
- Safety gear: Gloves, safety glasses, and protective clothing
Example Checklist:
- Optical power meter
- Visual fault locator
- Cable ties and labels for organization
Step 3: Mount the Distribution Box Securely
Mounting can be done on a wall or pole based on your site conditions. Follow these steps:
- Positioning: Hold the distribution box at the chosen location.
- Marking Holes: Use a marker to indicate where holes need drilling.
- Drilling: Drill holes as marked; ensure they are deep enough for secure anchoring.
- Securing: Attach the box using appropriate screws or anchors.
Ensure proper grounding if required by connecting a ground wire from the distribution box to an earth grounding point to protect against electrical surges.
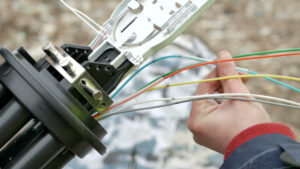
Step 4: Connect Optical Cables
Connecting cables accurately is vital for maintaining signal integrity:
- Cable Preparation:
- Strip off outer jackets of incoming and outgoing cables.
- Clean fibers using isopropyl alcohol.
- Routing Cables into Box:
- Insert cables through designated inlets.
- Secure them using clamps or cable ties inside the box.
- Fusion Splicing (if necessary):
- Set up fusion splicer according to manufacturer’s instructions.
- Align fibers in splice trays.
- Perform fusion splicing and protect joints with heat shrink sleeves.
- Connecting Ports:
- Plug in optical connectors into their respective ports.
- Use color codes or labels for easier identification.
Step 5: Test Cable Connections
Testing ensures that all connections are functioning correctly without significant signal loss:
- Initial Inspection:
- Check physical connections for tightness and accuracy.
- Verify that no fibers are bent beyond their minimum bend radius.
- Signal Testing:
- Use an optical power meter to measure signal strength.
- Employ a visual fault locator to check for breaks or leaks in fiber continuity.
- Performance Validation:
- Conduct attenuation tests across all connections using an OTDR (Optical Time-Domain Reflectometer).
Address any detected issues immediately by re-splicing or adjusting connections until optimal performance is achieved.
By following these steps methodically, you ensure that your fiber optic distribution box installation is robust, reliable, and ready to deliver high-quality network performance.
Importance of Quality Inspection and Testing
To make sure your fiber optic distribution box works perfectly, it’s important to carefully inspect and test its quality. These tests are essential for keeping the network connections strong and long-lasting.
Key Quality Inspection Tests:
- Waterproofing: Protects the internal components from moisture, preventing signal degradation and hardware damage.
- Dustproofing: Shields sensitive parts from dust particles that could obstruct or weaken signal transmission.
- Impact Resistance: Ensures the distribution box can withstand physical shocks or impacts, maintaining its structural integrity even in harsh environments.
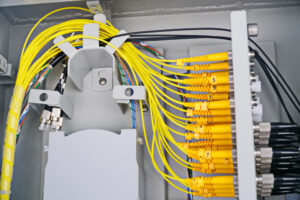
- Full-loaded Distribution Test: This involves testing a fully loaded distribution box with a splitter and pigtail to verify it can handle maximum capacity without compromising performance.
By conducting these inspections, you can catch any potential issues early on before they become major problems. This saves you time and resources in the future. Plus, when you follow strict testing procedures, you can be confident that your distribution box meets all the necessary industry standards for reliable and stable network performance.
Market Trends in Fiber Optic Distribution Box Technology
The demand for advanced fiber optic distribution box solutions is rapidly growing, particularly in FTTX scenarios (Fiber to the X), which include FTTH (Fiber to the Home), FTTB (Fiber to the Building), and FTTC (Fiber to the Curb). This surge is driven by the need for faster internet speeds and more reliable network connections.
Key market trends:
1. Faster Construction Techniques
Modern distribution boxes are designed to support quicker installation processes. Pre-terminated connectors and modular designs are becoming standard to reduce on-site labor and minimize installation time.
2. Simpler Installation Methods
Ease of installation has become a critical feature. Innovations such as tool-less mounting options, integrated cable management systems, and user-friendly interfaces help technicians install these boxes efficiently with minimal training.
3. Diversified Functions
There is a growing need for distribution boxes that can accommodate various network configurations. Multifunctional designs that support both passive optical network (PON) components and active electronic devices are increasingly popular. These versatile boxes offer greater flexibility for network upgrades and expansions.
Industry leaders are continuously innovating to meet these demands, developing products that not only meet current needs but also anticipate future technological advancements.
Conclusion
A well-installed fiber optic distribution box is essential for maintaining the performance of your fiber optic network. It helps minimize signal loss, protect connection points from the environment, and keep your network stable.
Here’s a recap of the steps covered in this guide:
- Determine the best location for your distribution box.
- Gather all the tools and materials you’ll need.
- Securely mount the distribution box in place.
- Connect and splice the optical cables properly.
- Test the cable connections to ensure everything is working correctly.
If you have a complex network setup or specific requirements, it’s worth considering professional help. They can provide expert guidance to ensure your installation meets industry standards and achieves optimal performance.
By taking the time to install your fiber optic distribution box correctly, you’re investing in the long-term efficiency and reliability of your network. This will enable it to handle current demands and future growth smoothly.
FAQs (Frequently Asked Questions)
What is the purpose of a fiber optic distribution box?
A fiber optic distribution box serves the purpose of protecting connection points, ensuring stability, and reducing interference in the network. It also provides a centralized location for managing and organizing incoming and outgoing optical cables.
What are the key components inside a fiber optic distribution box?
The key components inside a fiber optic distribution box include interfaces for cable connections, cable inlets for incoming and outgoing optical cables, splice trays for fusion splicing of fibers, and fiber splitter disks for splitting optical signals.
Why is it important to choose the right type of distribution box for specific needs?
Selecting the appropriate capacity, installation mode, application scene, and function is crucial to ensure that the distribution box meets the specific requirements of the network. This helps in optimizing performance and functionality.
What are some commonly used materials in the manufacturing of distribution boxes?
Commonly used materials in the manufacturing of distribution boxes include SMC (Sheet Molding Compound), ABS+PC (Acrylonitrile Butadiene Styrene + Polycarbonate), ABS (Acrylonitrile Butadiene Styrene), and PP (Polypropylene). These materials offer different properties such as strength, impact resistance, and environmental durability.
What are the steps involved in installing a fiber optic distribution box?
The installation process involves determining the appropriate location, preparing necessary tools and materials, securely mounting the distribution box, connecting incoming and outgoing optical cables, performing fusion splicing if required, and thoroughly testing cable connections for proper functionality.
What quality inspection tests should be conducted on a fiber optic distribution box?
Quality inspection tests such as waterproofing, dustproofing, impact resistance, and full-loaded distribution tests with a splitter and pigtail should be conducted to ensure that the distribution box can withstand environmental conditions and perform optimally under load.
Related Posts

customer-oriented
Fibermint is committed to exceeding our customers' expectations by always focusing on their needs and providing flexible services and solutions.
Global coverage
The company has fiber optic infrastructure in several countries and regions, enabling it to provide global network service support.
Professional Team
Fibermint has an experienced technical team with in-depth industry knowledge and technical expertise to provide full support from design, implementation to maintenance.